Recording API Requests
Beta Feature: This feature is currently in beta. We welcome feedback and bug reports via GitHub Issues.
Record HTTP traffic from your browser interactions and export it as an AI prompt for Claude, ChatGPT, or other AI assistants—or as raw curl commands for manual testing.
Overview
The Recording feature captures API requests as you interact with a web application in a real browser. This is useful for:
- Generating API tests from real user workflows
- Documenting API sequences with actual request/response data
- Creating AI prompts that include curl commands for test generation
- Debugging API interactions by inspecting captured traffic
Prerequisites
This feature requires an active Xplorer subscription. Go to Help > License to sign in. See Licensing & Sign-In for details.
Getting Started
- Click Agent in the left navigation bar
- Select Record API Requests from the use case list
- Enter the starting URL for your web application
- Click Start Recording
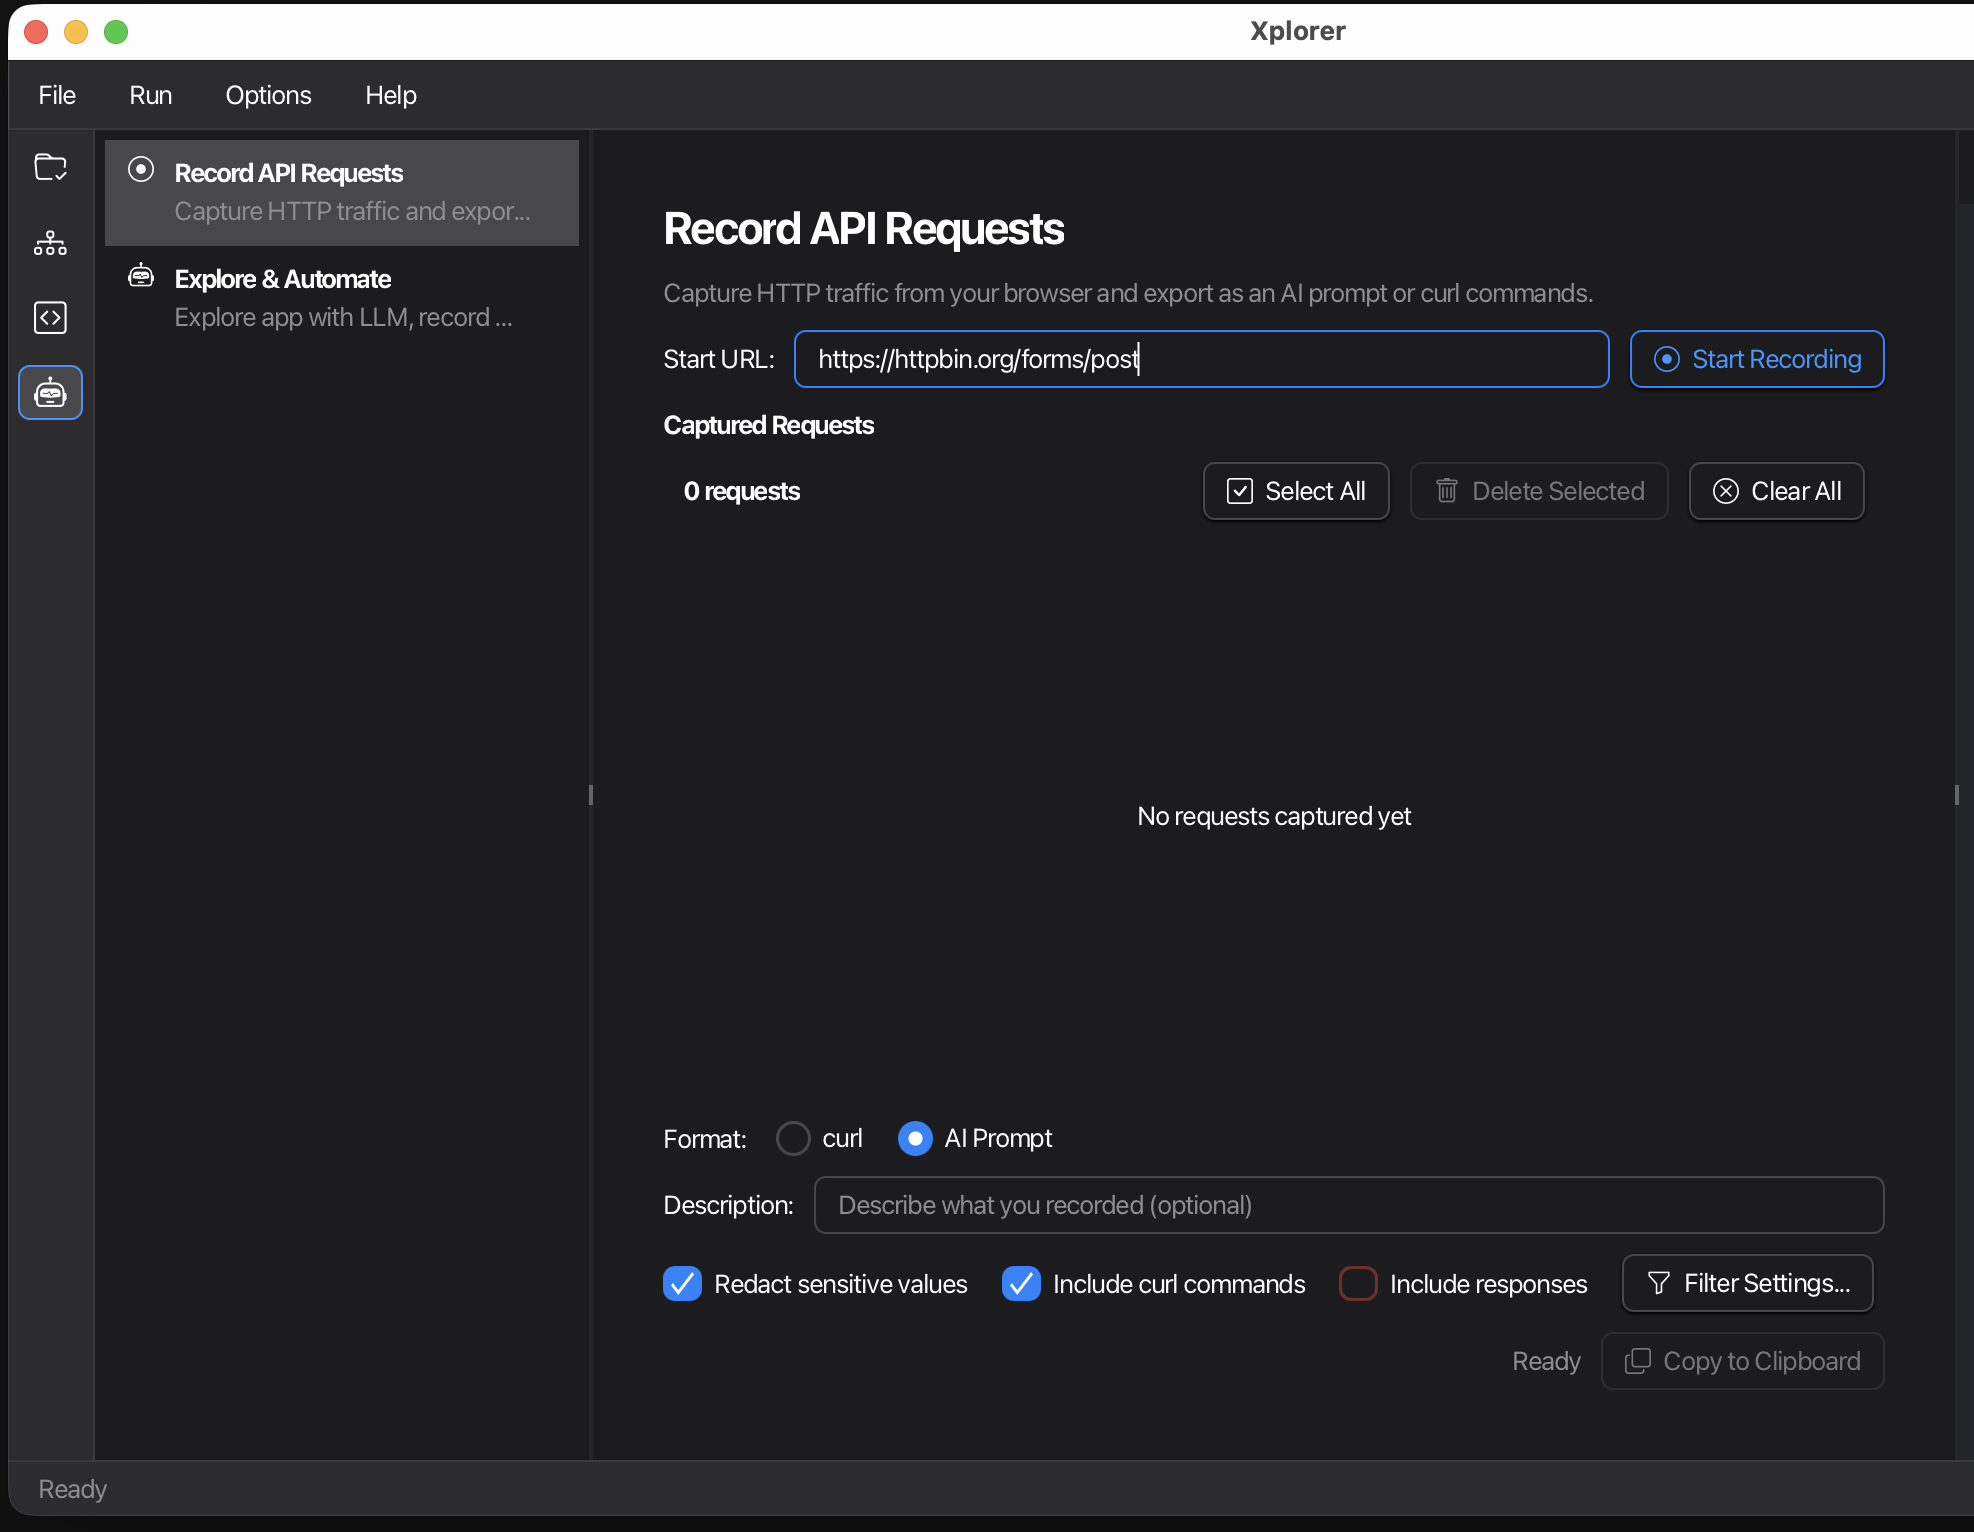
A browser window opens automatically and navigates to your URL.
Recording Your Workflow
With the browser open, interact with your web application as a normal user would:
- Fill out forms and submit them
- Click buttons and links
- Navigate through pages
- Perform any API-triggering actions
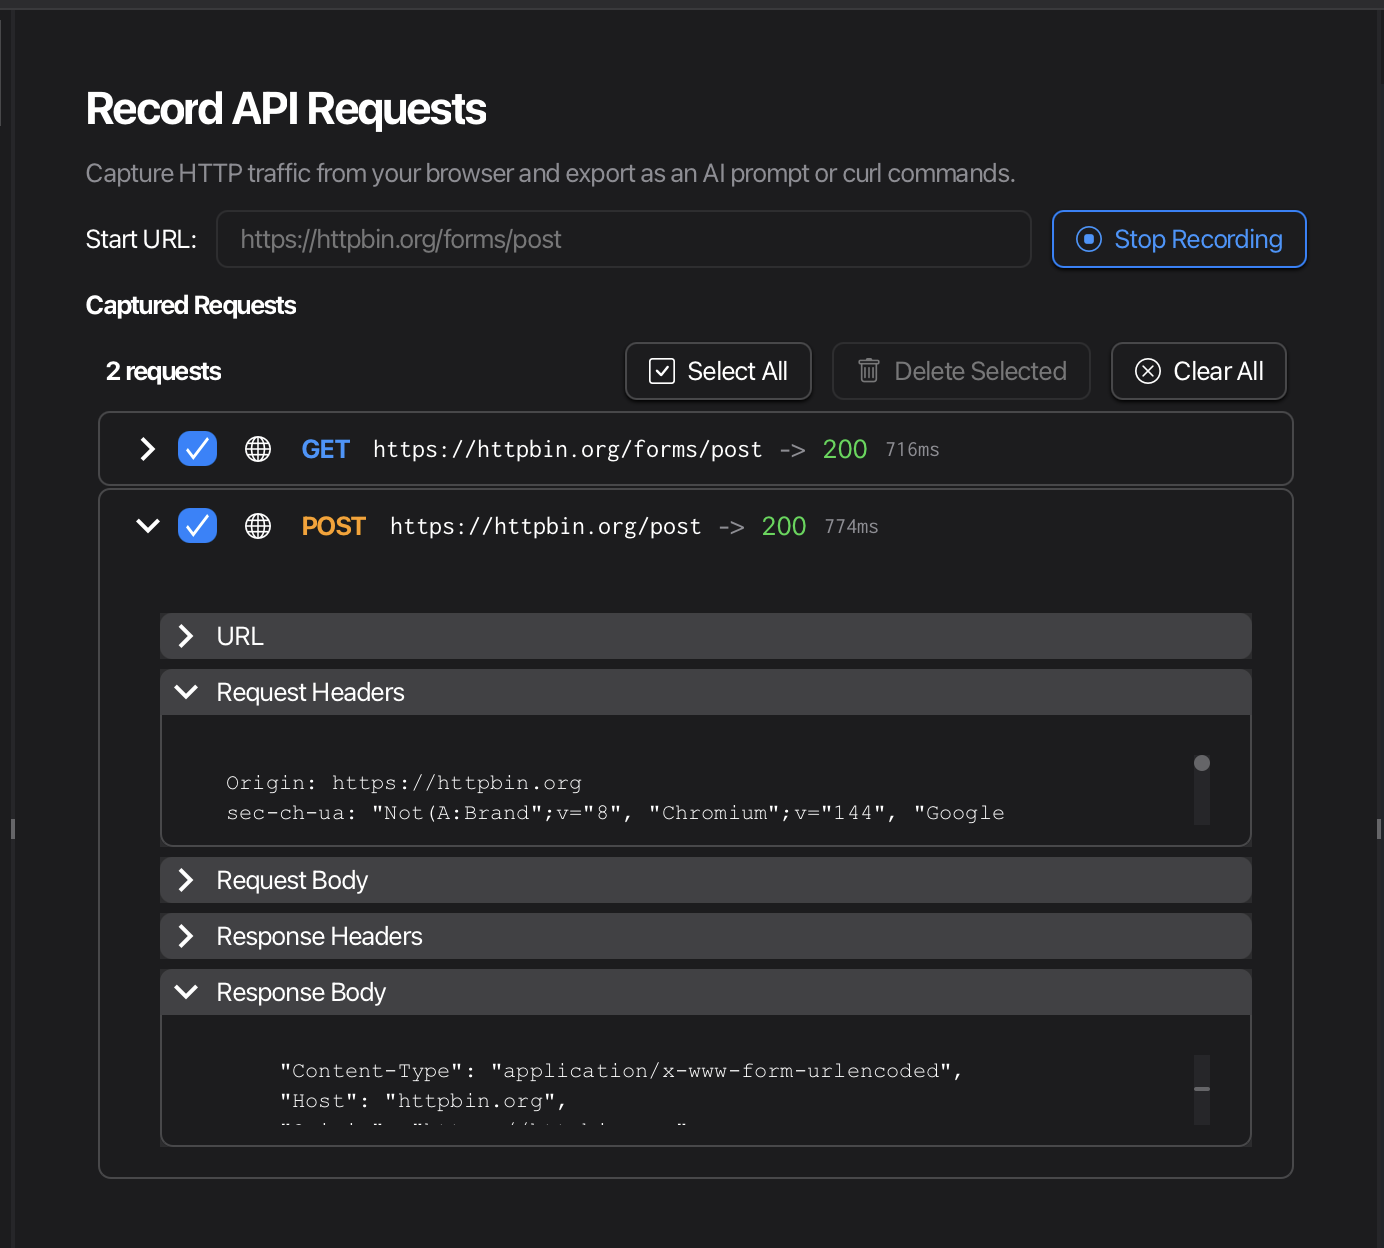
As you interact, captured API requests appear in real-time in the request list.
What Gets Captured
- XHR/Fetch requests: AJAX calls made by JavaScript
- Form submissions: Traditional HTML form POSTs
- API calls: Any HTTP requests to your backend
What Gets Filtered Out
By default, Xplorer filters out noise:
- Analytics and tracking (Google Analytics, Mixpanel, etc.)
- Static resources (images, fonts, CSS)
- Common third-party services
Managing Captured Requests
Viewing Request Details
Click on any request to expand it and view:
- Request method and URL
- Request headers
- Request body (for POST/PUT/PATCH)
- Response status and headers
- Response body
Removing Unwanted Requests
- Delete: Click the delete button on any request to remove it from the list
- Uncheck: Uncheck the checkbox to exclude a request from export without deleting it
Configuring Filters
Click Filter Settings to edit the list of excluded domains. Add domains for third-party services you want to ignore (e.g., cdn.example.com, analytics.example.com).
Exporting Requests
Once you’ve captured the requests you need, choose an export format:
AI Prompt Format (Recommended)
Exports a structured markdown document containing:
- Summary of captured requests
- Request details with headers and bodies
- Curl commands for each request
- Dependency detection (e.g., tokens from login used in subsequent requests)
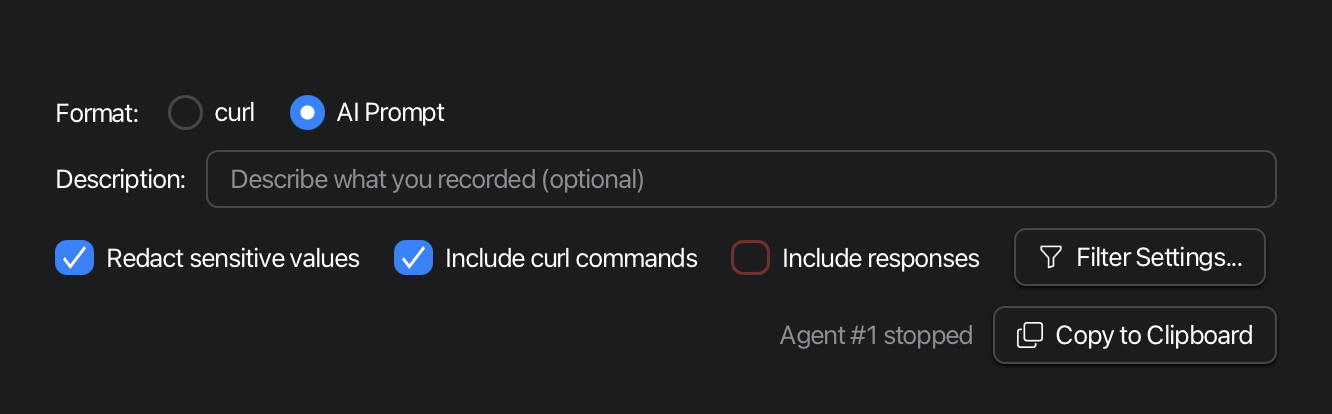
Export Options:
| Option | Default | Description |
|---|---|---|
| Redact sensitive values | ON | Replaces tokens, passwords, and API keys with placeholders like `` |
| Include curl commands | ON | Adds a curl command for each request |
| Include responses | OFF | Includes response bodies in the export |
Usage:
- Select AI Prompt format
- Configure options as needed
- Click Copy to Clipboard
- Paste into Claude, ChatGPT, or your preferred AI assistant
- Ask the AI to generate API tests from the captured traffic
curl Format
Exports raw curl commands for each request:
- Choose platform: sh (Unix/Mac/Linux) or cmd (Windows)
- Commands are ready to paste into your terminal
- Useful for manual testing or scripting
Stopping the Recording
Click Stop Recording to end the session. The browser window closes automatically.
You can export your captured requests at any time before stopping.
Tips
- Start with login: If your app requires authentication, start recording from the login page to capture the auth flow
- Be selective: Delete or uncheck requests you don’t need to keep exports focused
- Use redaction: Keep sensitive values redacted when sharing with AI assistants
- Check dependencies: The AI Prompt format detects when tokens from one request are used in another
Next Steps
- Browser Agent Server - Let AI agents automate your browser
- Licensing & Sign-In - Manage your subscription